Tuesday, July 12, 2011

Summer Project: Strawberry Jam

For many years, my Mom made strawberry jam in the summer.
I adore this jam....for me it is the perfect compliment to a toasted english muffin with butter.
So, making freezer strawberry jam has become a summer ritual for me now too.
Here are the kids and I as we picked strawberries for jam in 2006.
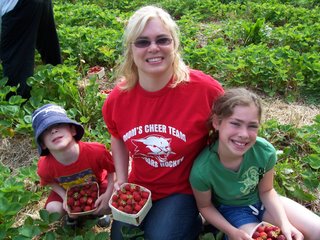
But now that they have aged to a teenager and an adolescent, I couldn't convince either of them to come pick berries with me!
Jeepers!
What's a mom to do?
You get over it and you buy the berries! That's what you do!
I have to say that I am extremely biased when it comes to strawberries.
To me, there is nothing that tastes better than a Nova Scotian strawberry.
I am not fond of those ping pong balls called strawberries in the grocery store during the off season.
And did you know that the #1 importer of Nova Scotia strawberry plants is Florida?
Our berries taste that good!

So here is Mr. Rascal helping to spin the berries dry after a good washing.
 My Mom....my mentor and best friend.
 Mr. Rascal helping to slice the berries.
 If you have never made freezer strawberry jam before....it is the easiest jam project ever.
This is the perfect BEGINNER project.
If you can mash potatoes and stir....you can make this jam!
It consists of washing berries, mashing berries, adding sugar, stirring, adding certo and lemon juice, more stirring and then throwing it into jars.
Just follow the easy directions on the Certo package!

 You are done!
That's all.
 Look...I made 4 batches of jam and 8 bags of berries for my mother's freezer in 3 hours.
And yes, these are coming with me back home to Alberta!
So I can have my toasted-english-muffin-with-butter-and-Nova Scotia-strawberry-jam treat
when it's -40 outside in January!


This post is linked to these terrific parties:

Somewhat Simple

Strut Your Stuff Saturday at Six Sisters Stuff

Sundae Scoop @ I {heart} Naptime

UndertheTableandDreaming


lil luna link party button


Thirty Hand Made Days


Monday, July 11, 2011

A Summer Birthday Party For A Special Lady....

So a few days after I arrived home in Nova Scotia, I had a special birthday party to attend to.
My sweet Auntie Z. was celebrating her 65th birthday and her family had organized a party for her at the local community center. The party was a fully catered meal for about 70 guests, and my job was to lend my hand to the decorating.
Because I had only arrived in the province 4 days before, my plan was to keep the decorations simple....white tablecloths, a cheery, happy yellow accent colour & fresh flowers.
I shopped for white tablecloths & the yellow napkins for a total of $30.
On the morning of the party, I went to the local grocery store & purchased $70 in fresh flowers to make
11 flower arrangements....9 for the guest tables, with 1 for the guest book table and 1 for the drinks table.
It took 2 hours to design the 11 arrangements and I think it added just the right amount of pretty to an otherwise boring community hall.
 I borrowed 11 mismatched clear vases from my mother, added some smooth rocks for weight and interest, and each arrangement had a single stem of a bright yellow gerbera daisy with surrounding flowers of white, green and lavendar.
Here's how it all looked:
Simple & pretty, right?
And on budget at $100.


Here is the birthday girl.
She has been the most wonderful aunt to me over the years. I was so happy to do this for her!
Here is the birthday girl's eldest son with his lovely wife and adorable son.
Here is the birthday girl's youngest son and my son.
And the birthday girl's husband {my uncle}and my son.
 I was so thrilled that I was able to be home for such a special party!

We have just finished our 2nd week in Nova Scotia and I haven't been in blogland much these days.
I really want to make the most of every minute here in my home province visiting and spending time with family & friends....building memories to take away with me back to Edmonton to comfort me all year long.

So please forgive me as I haven't visited much lately.
I promise when I get back to Edmonton, I will catch up with everyone!
xo


This post is linked to these great parties:


”Organize


Sundae Scoop @ I {heart} Naptime

UndertheTableandDreaming


lil luna link party button

Thirty Hand Made Days


Visit thecsiproject.com


Photobucket

Tips & Tuturials Tuesday at Stories of A to Z
Tip Junkie handmade projects

Tuesday, July 5, 2011

Our Seaside Vacation in Nova Scotia: Week 1

So last week the children & I boarded a plane and left for a month long vacation in my home province of Nova Scotia.We have been here a week already and it still feels like we got here yesterday!
Here is a peek through the first week of our vacation.
I just cannot get enough of my Mom's cooking! Here are her homemade seafood crepes & salad:
 We celebrated Canada Day on July 1st:

 We met up with some dear friends at a local Farmers' Market:
 Visited my 78 year old Grandmother at her apartment. We haven't seen her in 2 years:
 Celebrated my Aunt's 65th Birthday with a special party with 70 guests & strawberry shortcake: 
My brother took Tyler for an afternoon of dirt biking with my niece & nephew:
And visit with my Aunt & Uncle who are visiting from Alberta too! Ha! We live over 6 hours apart in Alberta!
And these are just but a few of things we did!
We sure are loving having no schedule!
We just wake up and see what the day brings!

I really want to say a special thank you to all my blog readers. I am so very grateful to all of you and thank you so much for blessing me with you time & attention!

Friday, June 17, 2011

A Vacation Memories Keepsake...

For the first time ever this year, our little family went on a warm winter vacation to somewhere semi-tropical...Florida.
We have always been too busy with our winter sports seasons to book ourselves this kind of vacation, or we just didn't have the extra in our budget.
But with the realization that our daughter will soon be off to University in 3 short years, we decided this year would be the year.
We had an amazing vacation....lots of wonderful, slow down-time on the beach.
No schedules. No early mornings. No practices. No homework.
It was peaceful & rejuvenating.

When I got home, I really wanted to make a tangible reminder of this vacation for us to remember.
I found a shadow box at Winners and I printed some black & white photos doing the thing we enjoyed the most...hanging at the beach.
We loved Cocoa Beach.


I really love how this simple project came together.
It is a snapshot in time....of the 4 of us together.
Happy. Relaxed.
A memory to place on our wall!


This post is linked to these great parties:

Somewhat Simple


The Girl Creative


Strut Your Stuff Saturday at Six Sisters Stuff

Sundae Scoop @ I {heart} Naptime

UndertheTableandDreaming


lil luna link party buttonThirty Hand Made Days


Organize and Decorate Everything


Photobucket


Tips & Tutorials Tuesday at Stories of A to Z

Tip Junkie handmade projects


Monday, June 13, 2011

The Perfect Picnic Sandwich {Oh Yes It Is!}

This is one of our all time favourite recipes ever.
Our all-time yummy-always-a-hit picnic sandwich.
I love it because not only is it a fabulous sandwich, but it is the ultimate in 'make ahead'  food.
It tastes better the day after it's made....after the flavours have had time to mingle.
It makes 8 sandwich wedges and each piece is very filling and satisfying.


This sandwich requires a filling, some meat & cheeses and a round loaf.
Step 1: The Filling.
5 seeded & chopped plum tomatoes
1 cup chopped red, orange or yellow peppers
1/4 cup chopped pitted black olives (I use kalamata olives)
1/4 cup chopped red onion ( I increase this to 1/2 cup)
2 garlic cloves, minced
1/2 cup chopped fresh basil. Do not skip this ingredient!
2 tsp. balsamic or red wine vinegar
drizzle of olive oil

Mix all of these things together.The tomato mixture is similar to a brushchetta topping. You can adapt the filling to your own tastes by adding grilled vegetables with hummus or pesto.
The filling will look like this:
Step 2: Scoop Out the Round Loaf
Scoop out the loaf so that you have about 1 inch of bread all around. Keep the 'hat' of the loaf for the finished sandwich.
Brush the inside of the loaf with olive oil.
This step prevents the bread from going soggy.
Step 3: Fill the Round Loaf
Now spoon half of the filling into the bottom of the bread and press down with spoon.
Then layer in half of the sliced meats.
You can use different salami, ham, turkey or even eggplant if you want to keep it vegetarian.
In this sandwich, I used sliced turkey & ham.
Then layer in cheese slices. I used havarti slices. Again, any favourite cheese can be used.

After the cheese layer, layer the remaining meat and spoon in the other half of the filling.
Place the 'hat' back on the loaf. Press firmly. You are done!
Step 4:Wrap the Sandwich for The Picnic
Wrap sandwich tightly in saran wrap.
Then I also wrap in tin foil.
Place sandwich in large bowl with some soup cans on top for weight to help "press" the sandwich.
(This step can be skipped, especially if you don't have room in your fridge for the big bowl).
Place sandwich in fridge overnight.
I usually slice my sandwich in the morning with an electric knife into 8 wedges.
Then I re-wrap the sandwich in plastic wrap and tin foil and place in the cooler until lunch time.

This sandwich doesn't take long to make. Once you chop up the ingredients for the filling, the rest only takes a few minutes. My 13 yr. old daughter has actually made this sandwich.


This post is linked to:
Cooking With Ruthie
i'am author of old country buffet coupons
that give mcdonalds coupons
breakfast coupons you also can find recipe from 
banana nut bread paula deen
almond roca | sometimes you may needbeef bourguignon