Showing posts with label food. Show all posts

Wednesday, October 27, 2010

A Family Favourite: An Oatmeal Breakfast Bar

I thought I would share one of our favourite breakfasts on cold winter mornings~

An oatmeal breakfast bar.
I started doing this a few years ago for my kids to 'up' the fun factor for breakfast.
The kids and I really like oatmeal....it's just fun to have different topping to change it up a bit.
It's a super easy project that takes little time.
You just  need a few jars, a pen and some labels.
Label the jars of oatmeal toppings.
Below are some of our favourite oatmeal toppings.
I try to keep it healthy~craisins, dried fruit, nuts & seeds & brown sugar.
But you could have any toppings you like!
Serve on a tray at the breakfast table.
You just need to add a pot of hot oatmeal and a small creamer of milk.
The kids love that they can add toppings to their oatmeal.
I love that they are eating something warm & healthy for their tummies.
We think it's a wonderful way to start the day.
 
If you liked this post, you might also like:
 
And don't forget to take at peek at these Pinterest Boards:
 
 
Thank you so much for visiting!


Monday, October 18, 2010

Menu Plan Monday and a recipe for Italian Wedding Soup...

I am not sure about everybody else, but I am still full from Thanksgiving Dinner over a week ago!
We had a fun week of leftover turkey and desserts.
We managed to squirrel away two lots of turkey soup for the freezer~it will make a great future supper on a cold night with homemade bread.

On this week's menu for our family:
Monday~ Leftover buffet {we have roast beef, ribs and chicken leftover from the weekend}
Dinnertime: 4 pm due to skating and hockey practice.
Tuesday~Homemade mini-pizzas with salad.
Dinnertime: 5 pm.
Wednesday~ Homemade skillet lasagna with Caesar salad.
Dinnertime: 3:30 pm due to hockey practice.
Thursday~ Chicken, rice and Greek salad.
Dinnertime: 5 pm.
Friday~Italian Wedding Soup with homemade bread.
Dinnertime: 4:00 pm due to hockey practice.
And here's a recipe for a family favourite that I would like to share:
Italian Wedding Soup
This a great soup for a chilly night with tiny meatballs, vegetables and chicken broth.
It can be made in under an hour, and is great the next day after the flavours have mellowed.

Mini-Meatballs for the Soup
1 pkg. of ground turkey
1/3 cup milk
1/3 cup finely grated Parmesan or Romano cheese
1 tbsp. dried parsley
1 tsp. dried oregano
1 tsp. finely chopped garlic
1 tsp. salt
1/4 tsp. black pepper
Pinch nutmeg
Mix meatball ingredients together in bowl.

Soup
2 L {or more} chicken broth
1 L water
4 garlic cloves roughly smashed
1 onion, peeled and rough chopped
1 bay leaf
1/2 tsp. dried oregano
3 carrots, peeled and thinly sliced
2 stalks celery, chopped
1 cup orzo pasta {or other small pasta}
1 large handful spinach, chopped

To make:
1.In large pot, heat a little olive oil and then add carrot, onion, celery and soup spices except bay leaf. The mixture will smell very fragrant as it cooks. When vegetables are soft, add chicken broth, water and bay leaf. Cover and bring to a simmer.
2. Make tiny, spoon-sized meatballs and drop into simmering soup. Meatballs will rise to top of soup broth when they are cooked. When all the meatballs are dropped into the soup, add 1 cup of orzo pasta and let soup simmer until orzo is cooked~ approximately 15- 20 minutes. Add in handful of chopped spinach.
3. Serve with grated Parmesan or Oregano cheese, and top with a spoonful of basil pesto. [optional].
Serve with a green salad and fresh rolls, biscuits or bread.

This is one of my family's very favourite meals.
Enjoy!
Make sure you visit Menu Plan Monday at
I'm an Organizing Junkie
for more great inspiration!


This post is linked to these great parties:

Saturday, September 25, 2010

Found: A dessert for Thanksgiving dinner....

The Brown Butter Pumpkin Layer Cake on the cover of the latest issue of Fine Cooking.
A delectable pumpkin spice cake with a topping of pecans, brown sugar and crystallized ginger.

Doesn't it look scrumptious?

I am having guests for Thanksgiving dinner...and I am so excited to make this cake!

I  started reading Fine Cooking a few years ago.
It is my very favourite cooking magazine.
Everything recipe I have tried from this mag has been outstanding.

Monday, September 20, 2010

Menu Plan Monday... Plus What Everybody Needs to Know About Menu Planning And Feature Family Fav Recipe: Shrimp Creole.

I love Menu Plan Monday.
I just don't feel organized for the week unless my menu plan is done.
I love when dinner time comes around and I have a plan.
I know lots of people who don't do menu planning but wish they did.
The first comment I hear is that they don't know where to start.
Here are my top 3 tips for making a menu plan.

1. Ask family members what some of their favourite meals are. Make a list of meals to pick from for future menu planning.You might think you know what their favourites are, but I have learned that when I ask this question, sometimes I am surprised by the answer!

2. Take a look around your fridge and freezer. What's in your fridge already that needs to be used before it goes bad? What's in your freezer that can be made into a meal? Incorporate these into your meal plan for the week. This saves you money by using things you already have before spending more money on duplicate items. This week, I have broccoli in my veggie crisper that needs to be eaten....so that's the green vegetable for today's meal.

3. Read the grocery flyers to see what's on sale this week. Take advantage of sales in your menu planning. This saves you money, especially in the fruits and vegetables department!

Now, write down 5-6 meals for the week using the information you have collected!  Now you can create your grocery list! Save cooking with new recipes for the weekend when more time is available.

Would you like more menu planning examples and ideas? Visit the blog I'm An Organizing Junkie. She hosts Menu Plan Monday every Monday and over 300 women link up with their menu plans for the week. It's fabulous! Click on the link below to visit!


Organizing Junkie


My menu plan for this week:
Monday-Basa fish, jasmine rice, broccoli & carrots.
Dinner Time: 3:00 pm
{The basa fish was bought on sale and in my freezer already. Broccoli and carrots already in the crisper and need to be used.} Due to sports activities, we are eating at 3pm when the kids arrive home from school starving and hungry. We all need to be out the door by 4:30 pm. Each child will also have snack before bed such as: fruit, toast & yogurt.
Tuesday- Greek chicken with Greek salad, pita bread and tzatsiki.
Dinner Time: 5 pm.
{The chicken is already in our freezer from Costco. The tzatsitki needs to be eaten before it expires soon, as does the romaine lettuce.}
Wednesday-Pulled Pork Sandwiches & coleslaw.
Dinner Time: 3:00 pm
{We are eating dinner early today because of sports activities.Pork already in the freezer from Costco.}
Thursday-Italian wedding soup and crusty bread.
Dinner Time: 5:00 pm
{Ground turkey from Costco already in the freezer.}
Friday- Order out night.
Saturday- Make your own Pizzas.

And now for one of our family favourites:
Shrimp Creole
This is a classic Louisiana dish which tastes great on a cold night.

1 tbsp.  vegetable oil
1 medium onion, finely chopped
4 staulks celery, chopped
1 green bell pepper, chopped
2 cloves garlic, minced
1 tsp dried oregano
1/2 tsp. drimed thyme leaves
1/2 tsp. salt
1/2 tsp. cracked black pepper
1/2 to 1 serrano chili, finely chopped
1 can 28 oz. diced tomatoes, drained
1/2 cup clam juice, fish stock, or white wine
1 tbsp. Worcestershire sauce
1/2 cup finely chopped parsley
Zest of 1 lemon
1 lb. shrimp, cooked, peeled with tails off.

Directions: In skillet, heat oil over medium heat. Add onions, celery, and green pepper and cook, stirring, until softened. Add garlic, oregano, thyme, salt, pepper, & chili pepper and cook for 1 minute. Add tomatoes, stock or wine and Worcestershire sauce and bring to a boil. Turn heat to a simmer and add shrimp, parsley and lemon zest. Stir thoroughly and heat until shrimp is hot. Serve immediately. {Don't allow to simmer once you have added shrimp because the shrimp will turn tough and chewy.}
Serve with hot rice, a green salad and hot crusty bread.

Our entire family loves this meal. It tastes great when heated up the next day too!


This blog post is linked to these great parties:

Beauty and Bedlam


It's a Blog Party

Tuesday, September 7, 2010

Getting Ready for Crazy Times Ahead: Kid-Friendly & Ready To Eat Meals in Minutes

Fall is so busy with after school activities.I see crazy times ahead. Both my children are heavily entrenched in winter sports.For my daughter.....it's synchronized skating and figure skating.For my son....it's hockey.Both will be out of the house after school a few evenings a week for their sports.This leaves me with the task of feeding them nutritious food that is ready at the quick and can be eaten in minutes.

I was doing my daily round of blog reading this morning and enjoying the parade of recipes at Balancing Beauty & Bedlam when I came upon this idea for healthy burritos for the freezer from "Eat At Home" blog. I loved the idea, so after my walk this morning, I decided to hit Costco to pick up the things I needed to put this idea into action.

Burritos are the perfect food for a hearty after school snack that will tide a child over for a few hours, or it can also be a dinner. Or just eaten whenever!
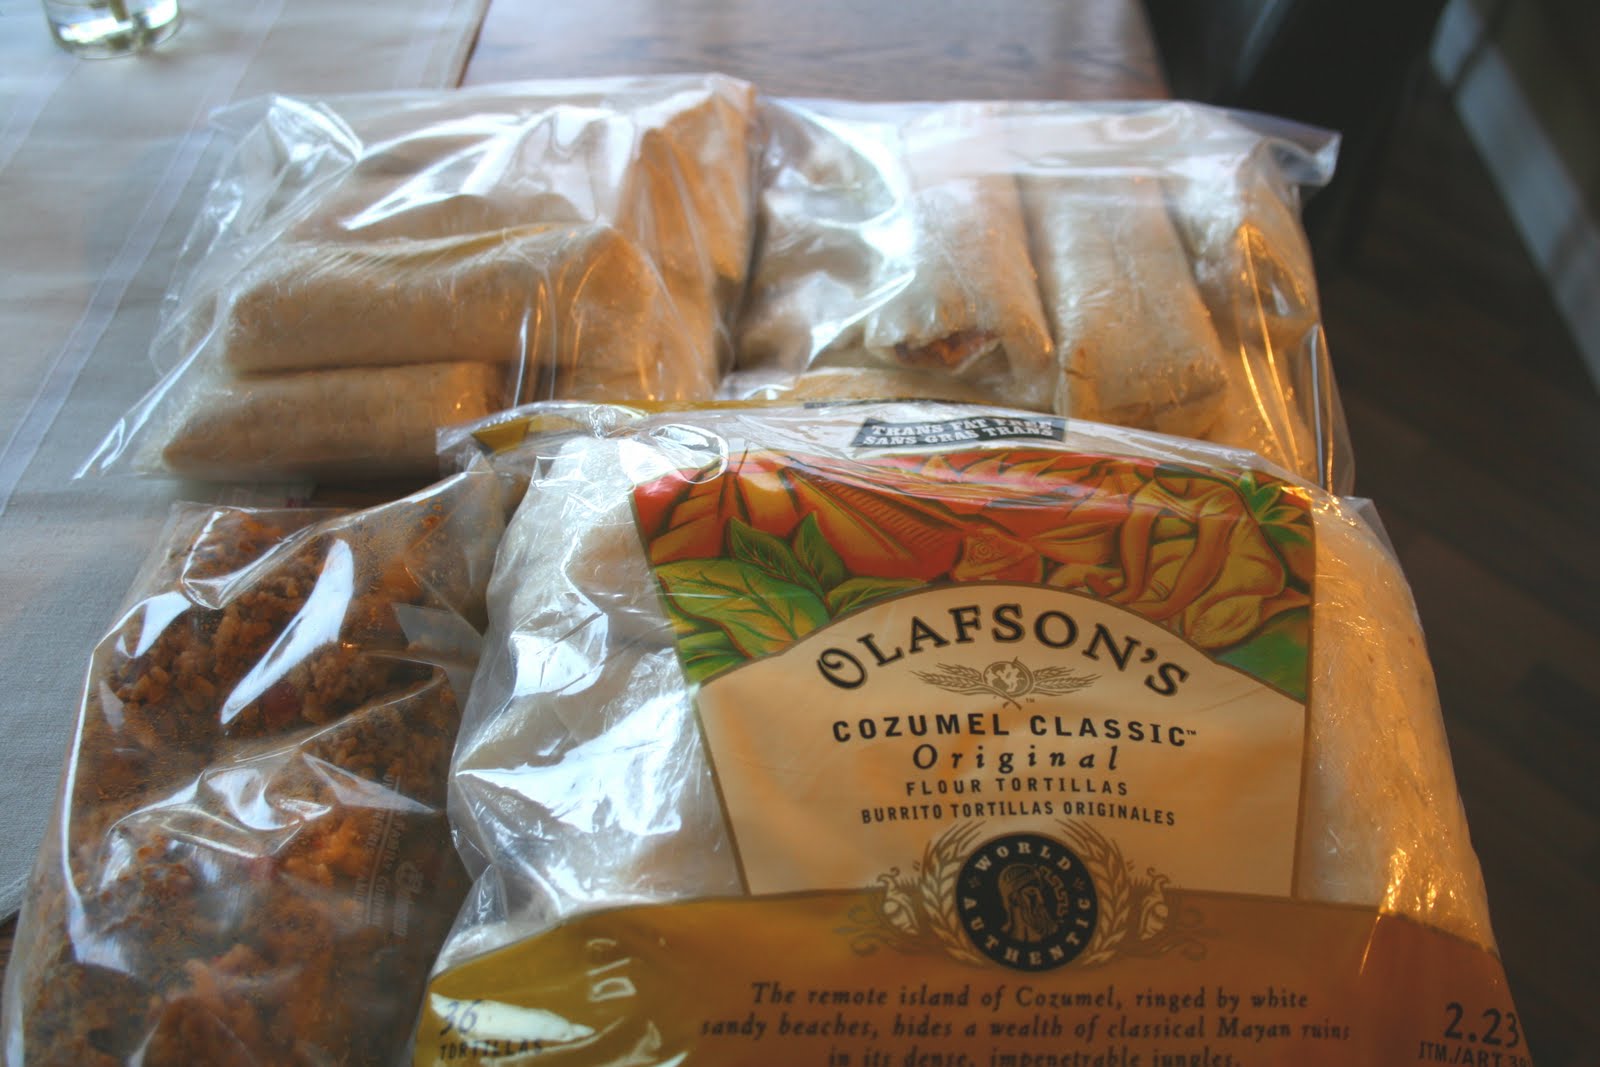
Although the original idea I saw was for bean & rice burritos,  I know that my family prefers beef burritos...so I made those instead. I picked up some organic brown rice and a big package of flour tortillas. {36}, and a $10 package of lean ground beef at Costco.
I started cooking the brown organic rice according to package directions. I made 9 cups of rice.
I placed the ground beef in the frying pan and added:
1 onion, diced
1 red pepper, diced
1 yellow pepper, diced
3/4 cup  Clubhouse taco seasoning {I added 1/2 cup at first, then adjusted it up}
1 teaspoon chipotle chili powder
1 tbsp. regular chili powder
1/2 tsp. garlic powder
salt & pepper
{I hope my husband isn't reading this...but I put in a can of mashed black beans too....for extra fiber.}
I found this can of enchilada sauce in my pantry, so I added one can just to add a little more flavour.
When the rice was finished cooking, I mixed it with the ground beef mixture in a big bowl.
Then Hunter and I stuffed  & rolled the burritos and added shredded cheddar.
 I rolled the burritos individually in saran wrap.
And all the burritoes went into bags for the freezer.
I also had some ground beef & rice mixture left to go in the freezer as well.
To serve: Heat in the microwave for a minute or two {depends on your micro wattage.}
Add salsa and sour cream as desired.

Only 32  of my 36 burritos made it into the freezer.
The others were kidnapped before they made it to the saran wrap stage.

The only way that today could have been better was if my Mother was here to help me! She is the queen of the freezer and a master at pre-planning meals!


Monday, September 6, 2010

A Very Simple Harvest Supper...

Despite the threat of clouds and rain, Hunter & I hit the local Farmers Market on Saturday.
We found lots of fabulous looking fruits and vegetables.
The fruit below looked so scrumptious and yummy, and for $8.00 for this selection,
how could I pass it up?
Below shows everything we came home with.
It all smelled so good.
I decided that a very simple harvest supper would be our meal that night.
I started with building a simple heirloom tomato salad.
It was simple: tomatoes, fresh mozzarella, freshly cracked black pepper & salt, and a drizzle of balsamic vinaigrette.

Fresh corn was the next course for our meal.
By the way, I have learned to cook corn in a new way.
Previously, I  have always shucked the corn ears before adding to boiling water.
However, I was told by the corn farmer to leave the corns in their husks while cooking to seal in the nutrients and juices.
I did as I was told.
The taste of the corn cooked this way was so good...so tender & juicy.
I don't think we will cook it any other way from now on.
And to finish the meal, a sampling of fresh fruit.
An hour later, this fruit plate was empty.
Our simple harvest supper was such a hit that it was requested for Sunday night supper.
And  for Monday night supper.
And I had to go buy more corn.


This post is linked to:

Metamorphasis Monday @ Between Naps on the Porch
Motivate Me Mondays @ Keeping It Simple
Delicious Dishes @ It's A Blog Party
Tasty Tuesday @ Balancing Beauty & Bedlam
All Things Domestic @ Crazy Domestic


linkparty

Tuesday, August 24, 2010

Save Your Fork....There's Pie...

It all started with my friend, Gloria, mentioning that she had raspberries in her backyard. Wild raspberries.

And then I mentioned that raspberry pie was one of our absolute favourite pies.

'baking date' was on.

A day to go to her place, pick raspberries, and then make pies. We decided to make little hand pies {tarts] since we thought single serving baked goods were the way to go.

On the pre-planned day, we arrived at her house and headed to the backyard to pick our raspberries. {And let me tell you...the skeeters in that berry patch were thick.} The berries, unfortunately, looked as though they had been well picked over. So we started picking anyway. We  picked for a good 20 minutes when Hunter came over to dump her little bowl of berries into my bigger bowl.

She poured about 8 berries into my bowl.  And then we laughed like 2 fools between the bushes.

So we continued, our prize being the fresh baked pie we would make later, and after a good 45 minutes, we had a scant two cups of berries.

Then we headed to Gloria's kitchen and decided to mix our raspberries with blueberries so we could make more tarts. We mixed up our pastry....we used the recipe on the back of the Tenderflake tub. In my opinion, it's the best. It makes pastry that is flaky and tender. Then we cut circles and placed them into muffin tins for our little hand pies. The berries were mixed with 1/2 cup of flour and a cup of sugar to make them into a bit of a thicker filling.
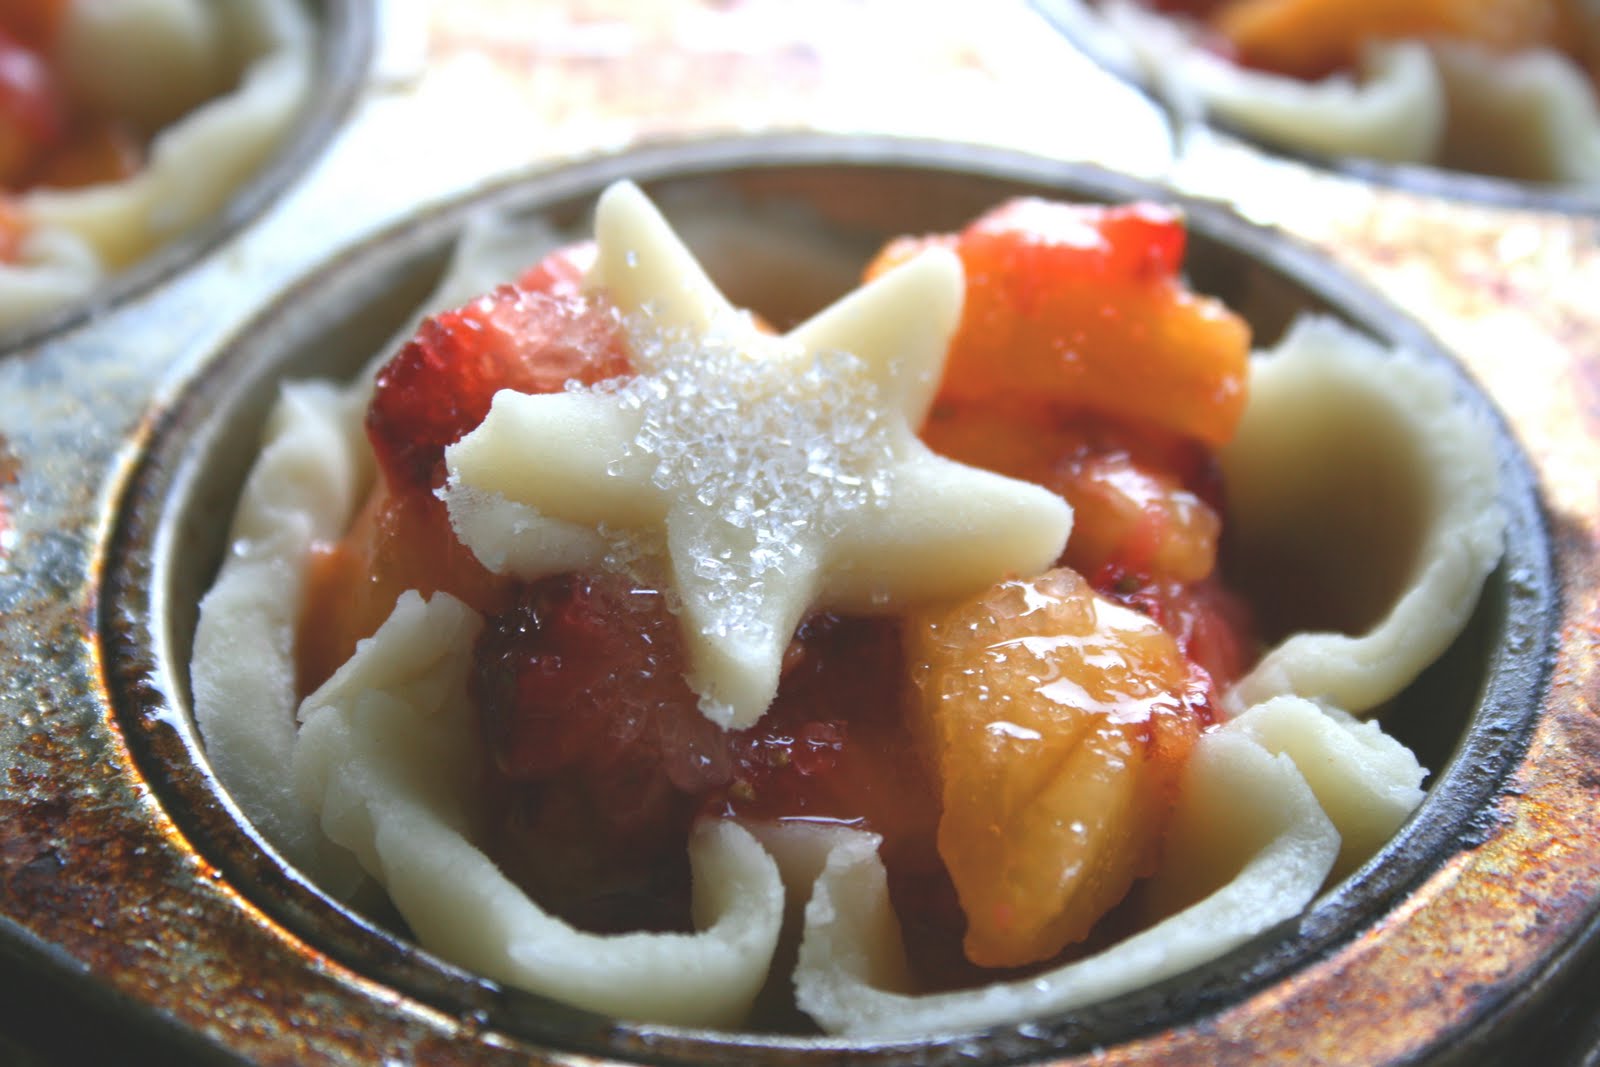
Hunter loves to roll pastry, so she took over this job. She also cut out the little pastry stars for decoration. Gloria and I looked after putting the pastries into the tins and filling them with fruit, and adding the star and the sanding sugar.
When we ran out of the raspberry/blueberry mix, we decided to mix up some strawberries and peaches to make more tarts....until the pastry was all used.

There is nothing better than fresh-baked pies out of the oven.  And when you don't make homemade pies often, the smell and taste is heavenly.
The sweet reward of our day....a fresh baked pie and a cup of tea.

Our baking 'date' was so fun! We plan to do another day soon.

Thursday, August 12, 2010

Camping Cuisine Part 5: Great Travelling Bean Salad

This is the last of my 5-part series on recipes for camping trips.
Whew! Are you bored yet, or are you inspired?
I like to think that I have inspired some campers to mix it up a little. I hope so.
To be clear, we do have hamburgers sometimes....everyone in our family likes them. I just make sure that I make the burgers before we leave home so that my husband just has to put them on the grill.
And we take hotdogs for snacks because, afterall, what is a camping trip without roasting weinies on a campfire?
On our last camping trip, I took along a bean salad which included lots of veggies. It's a fresh take on the bean salad that we all used to eat 20 years ago...you know...the one with the canned wax yellow & green beans. The recipe comes from Eat, Shrink & Be Merry. (I know, I know..those sisters again.)
I chose this recipe because it's a marinated salad and it only gets better with age, therefore, it makes a great camping recipe.
I modified the recipe a bit because my husband is not crazy about too many beans. {And everyone has to sleep in a tent together...so enough said about that.} So I reduced the bean requirement to half and added more diced bell peppers.

The recipe made so much that it actually fed 3 families and we still had some leftover!

The recipe is two parts: one part for the beans & veggies; one part for the dressing. The ingredient list seems long, but the effort is worth it...I promise!

Salad:
2 cups fresh or frozen green beans, lightly steamed to just bright green. {I used frozen organic from Costco.}
1cup canned chickpeas, drained and rinsed
1 cup canned black beans, drained and rinsed
1 cup red kidney beans, drained and rinsed
Note: You are only using half a can of beans for the above beans. I tossed the leftover beans into a ziploc bag & placed in the freezer.
1 can whole kernel corn ( I used mini corn...I just like the look better.)
1 cup diced red onion
1 red bell pepper, diced
1 yellow bell pepper, diced
1/2 cup fresh parsley, finely chopped
Dressing:
1/2 cup light olive oil
1/2 cup white vinegar
2 tbsp. sugar
1 tsp. dijon mustard
1/2 tsp. celery seed
salt & pepper to taste.

Combine all salad ingredients in a large bowl. Mix well.
Whisk together dressing ingredients in a small saucepan. Bring to a boil. Remove from heat and pour over salad ingredients. Stir gently. Cover and refrigerate overnight.
I served the salad as a side to our hamburgers one night for dinner. It was so good.

This salad travels really well. I highly recommend it!
And to finish off this series, here are two of my favourite things in our camping kitchen...
A handy, dandy screen to keep those pesky flies off of the salads.
And our cutlery caddy to keep everything handy at the table, so I don't have to get up a million times searching for things.
I hope on your next camping trip you feel inspired to try something new and fun!
 
If you liked this recipe, here are some other amazing camping recipes:

i'am author of old country buffet coupons
that give mcdonalds coupons
breakfast coupons you also can find recipe from 
banana nut bread paula deen
almond roca | sometimes you may needbeef bourguignon