Showing posts with label homemaking. Show all posts

Sunday, July 17, 2011

Organizing A Breakfast Station...

You didn't really think I would go on vacation for a whole month and NOT find some organizational project to tackle, did you?
I can't help it....it's just the way my brain works!
So while eating breakfast in my parent's kitchen one morning...it came upon me that I could tweak the 'breakfast station' to make it more functional & organized.
Here is the breakfast area before...
Take note there is no toaster or coffee maker.
BEFORE:
Now this is better...the toaster & coffee maker can finally attend the breakfast meeting.
AFTER:
 Observe the cereal cupboard. There are no bowls or spoons for cereal located here.
Or bread plates or butter for toast. Or bread for that matter.
BEFORE:
We added a  second shelf to the cupboard on the left which made room for cereal bowls, bread plates, egg cups, fruit nappies, toppings for oatmeal and toast. The butter dish is on the counter for easy access; and the bread now lives in a drawer below too. Much better!
AFTER:
Before the toaster oven and a catch-all drawer took up valuable real estate.
BEFORE:
Now behold the coffee area with mugs above and pods for the Tassimo coffee maker organized in a newly installed cutlery/coffee drawer below.
AFTER:
Now this breakfast area works beautifully.
One visit here can bring you a bowl of cereal, a plate of toast and a mug of coffee.
And for the amount of overnight guests that my parents host on a regular basis,
this re-organization of the breakfast station makes perfect sense!



This post is linked to these great parties:


Organize and Decorate Everything
Visit thecsiproject.com

Somewhat Simple

Tip Junkie handmade projects


Strut Your Stuff Saturday at Six Sisters Stuff

Sundae Scoop @ I {heart} Naptime

UndertheTableandDreaming


lil luna link party button

Tuesday, February 8, 2011

Everyone Needs A Little Mu Shu...

I just love this meal. It comes together so fast and everybody likes it.
I am talking about Mu Shu Pork.
My kids laugh when we talk MuShu' for dinner.
I think there's even a Veggie Tales song with Mu Shu in it...can't remember the name of the song though.
{oh yeah...it's called Do the Mu Shu}


Mu Shu Pork

1 large pork tenderloin {about 1 pound}, cut into 1/2 inch strips
1 tablespoon Asian chili-garlice sauce
2 tablespoons vegetable oil
8 oz. shiitake mushrooms, stemmed and sliced thin {I have used regular mushrooms}
1 tablespoon grated fresh ginger
1 14 oz. bag coleslaw mix
1 cup hoisin sauce
2 tablespoons dry sherry
3 scallions, sliced thin for garnish
1 pkg. bean sprouts for garnish
8 8-in flour tortiallas, warmed

1. Pat pork dry and toss with chili-garlic sauce. Heat 1 tb. oil in large skillet over medium-high heat. Cook until pork is no longer pink-3 to 5 minutes. Transfer to plate and tent with foil.

2. Add remaining oil and mushrooms to skillet and cook over medium high heat until lightly browned, about 5 minutes. Stir in ginger and cook until fragrant...about 30 seconds. Add coleslaw mix and cook until wilted...about 3 minutes. Stir in pork, along with and pork juices on plate, 1/2 cup hoisin sauce, sherry and cook until sauce in slightly thickened..about 1 minute.  Spoon pork mixture onto to warm tortillas. Sprinkle with sliced green onion and bean sprouts for extra crunch and flavour. Pass remaining hoisin sauce at table.
***

On Sunday night, I opened the fridge and found this:


Yes. It says 'TOUCH & DIE'.
Hunter developed a special cupcake recipe as part of a project for school and these are the samples that she is taking to school.
I think she was worried that they would not survive the night!
They do look yummy!

Wednesday, February 2, 2011

A Simple Way of Organizing Photo Negatives & Printed Pictures & My Goal for 2011...

Almost  6 years ago, I moved 3000 miles across the country.
It was a big move.
One of the things that I wanted to make sure made the move safely were my precious picture negatives of my babies growing up.
I made the decision to hand carry my negatives myself in my carry-on baggage.
This way I knew that they would make the journey safely...with no danger of being lost or damaged by the moving company.
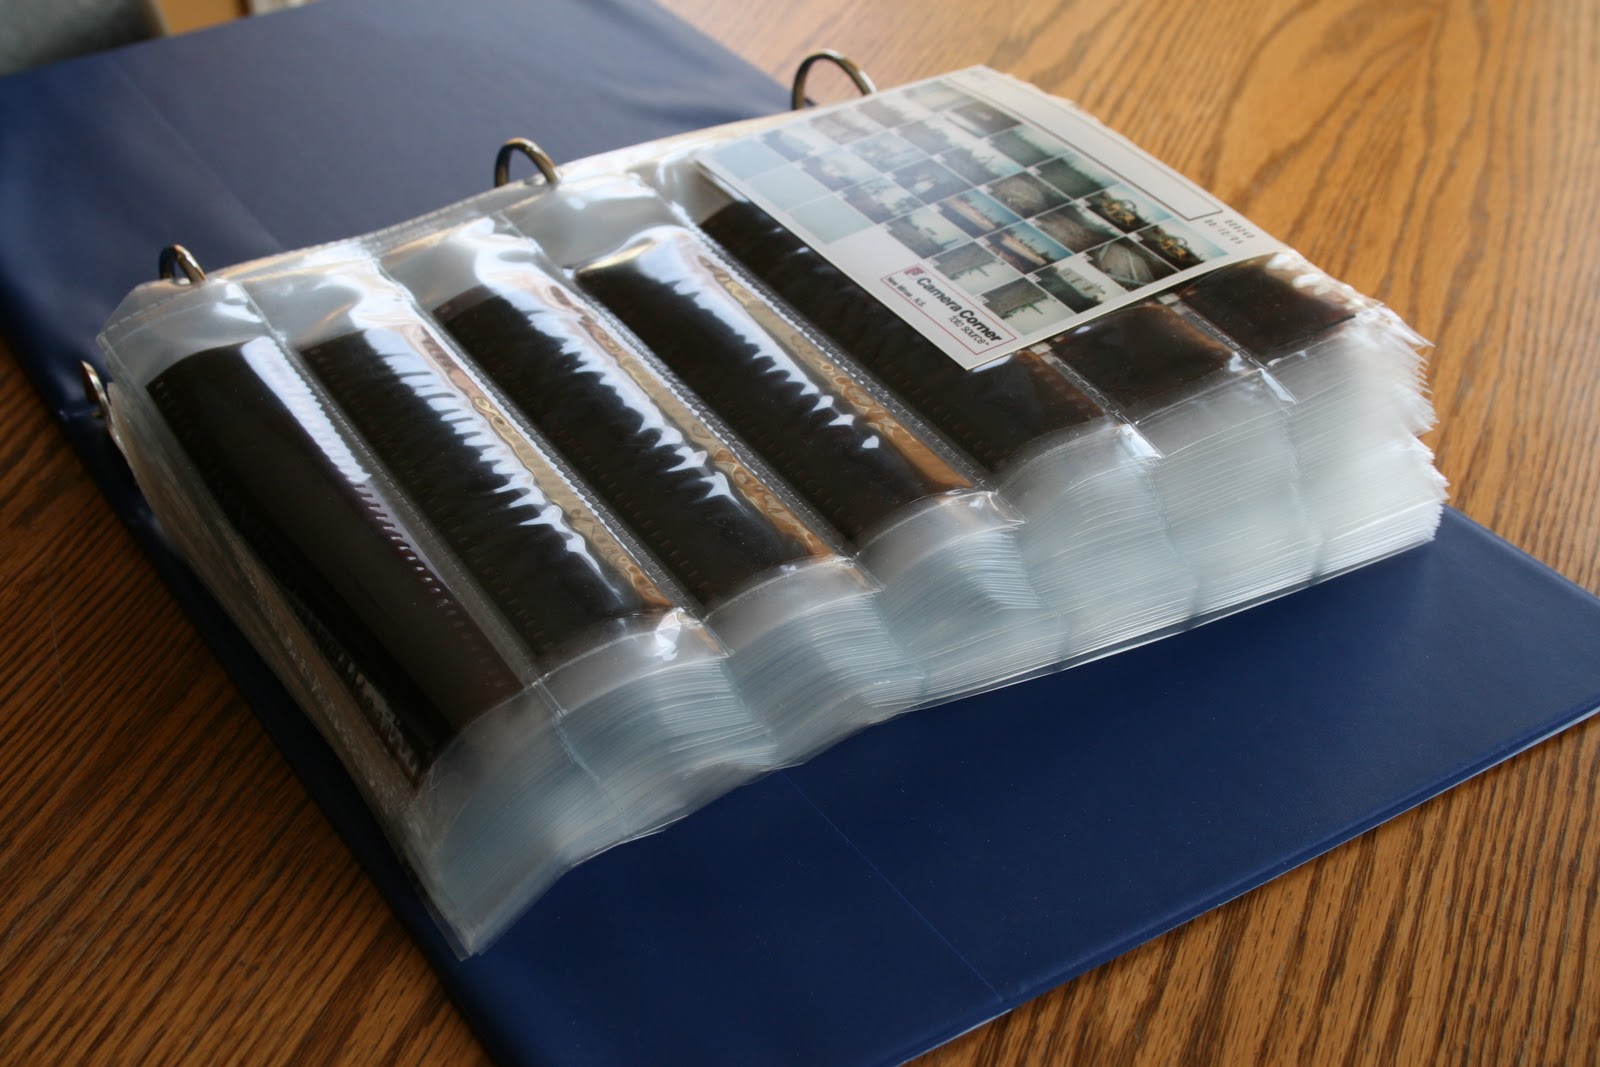
So I organized my negatives into a binder using protective negative sleeves.
 I moved all my negatives into the negative sleeves, and arranged them chronologically.
 I attached the contact sheet for each film on the appropriate protective sheet so I could quickly identify the negatives in the sleeves.
And I numbered each contact sheet/sleeve so that I would know the order of the sheets and where each belonged.
I used scrapbook adhesive to attach the contact sheets {the miniature sheet that shows whats on a roll of film}to the protective sleeves.
 This binder held 70 sheets, or negatives for 70 rolls of film.
 This method worked great for negative storage....and all my negatives arrived safely with me to our new home.

I started scrapbooking in 1999...... and organized photo storage is so important for pursuing that hobby because you can't scrapbook if you cannot find the photos you are looking for!
 This is the way I have been storing my photos for years now.
Lots of people use this method.... basic storage boxes.
The photos are stored by year and arranged in chronological order.
 I keep all the photos in their developing envelopes.
 However, I make sure to label all the envelopes with the date and what's inside.
I use simple white labels adhered to the envelopes and a pen.
This makes it easy to look for photos when scrapbooking too.


Easy Peasy.

For years and years people kept unorganized photos in old shoe boxes.
One of the big pushes behind the scrapbooking movement was encouraging people to get those photos organized and stored properly.
But then....enter the digital age.
Many, many households have switched to digital photography, but I think that many of us have exchanged those old shoe boxes for j.peg files that are not stored or backed up properly.
I know I am one of those!

I came across this article in the February 2010 issue of Real Simple Magazine and I saved it because it was so inspirational. It shows how one mom, Michele Bender, has all of her digital photos organized and labelled on discs.
This picture is just perfection...don't you agree?

So now....one of my goals for 2011 is to get my digital pictures off my computer and organized into a storage system like this!
I have pictures from 2006 onward to tackle.
I know that it will take some time and effort.
And I also want to get into the habit of printing pictures monthly.
 I am determined.


This post is linked to:


Visit thecsiproject.com


Organizing Junkie


Organize and Decorate Everything

Wednesday, January 26, 2011

How I Organized My Greeting Cards....

So today I scheduled in a little time to tackle this project that I have been wanting to do forever.
Not really forever. But at least since I re-organized my office space.
I had greetings cards 'thrown' into an Ikea storage box.
Every time I wanted a card, I had to rifle through the whole box to find what I was looking for.
No more.
 I took some bright pink cardstock and my index tab punch.
I love that index tab punch.
{I chose bright pink cardstock because it's easy to see and doesn't blend in with the cards.}
I cut the cardstock with the paper trimmer to make 'dividers' to fit the box and punched tabs from white cardstock for each divider. I stapled the tabs to each divider.
Then I sorted the cards into piles and wrote on each tab the contents.
Then I filed each card pile into the appropriate spot.
 Now I have this:

 This project cost nothing since I used things I already had...a paper trimmer, cardstock and index punch.
{You don't really need an index tab punch....you could just use small squares of cardstock.}

And here's one hint:
I buy most of my cards at the dollar store and the size fits nicely into this box.
If you buy more expensive cards...they are usually bigger and won't fit into this system as nicely. They may even be too big to fit into the box this way. So if you have bigger cards, you may want to buy a bigger box.


This post is linked to:


Visit thecsiproject.com


Organizing Junkie


UndertheTableandDreaming


Organize and Decorate Everything


Weekup Wrap Up Party @ Tatertots & Jello.

HouseofHepworths

lil luna link party button

giveaways

i'am author of old country buffet coupons
that give mcdonalds coupons
breakfast coupons you also can find recipe from 
banana nut bread paula deen
almond roca | sometimes you may needbeef bourguignon